Wall by Wall
Ok. Folks are giving me a real hard time about not giving them more pictures. More, more, more! I understand. I’ve been installing someone else’s kitchen this week. Today I had two commercial auditions as well. So I showed up at West 10th Street in the West Village in a black suit with a bag of work clothes, changed, worked for two hours, changed, took a cab to Park Ave South and 27th Street, tried to lip-sync to “We Wish You A Merry Christmas”, hustled back to the job, threw up a few cabinets and a hood, then zipped across to East 46th street for a voice over go-see. Then over to Reproductions to order more headshots and home, where I changed into work clothes and did an hour and a half of taping before settling into the Lehrer hour on PBS. Ah, the life of an actor/carpenter.
So as the work has slowed down and become less dramatic, lets take this opportunity to review the project wall by wall, beginning with the kitchen.
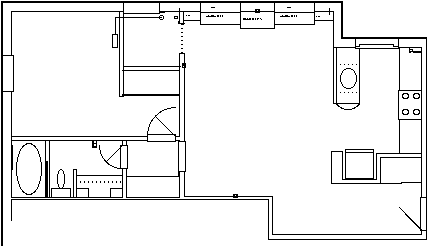
Floor plan reminder.
The East Wall.
This is one of the two main walls. It gets the stove and lots of cabinets and counterspace. As you can see by the picture…
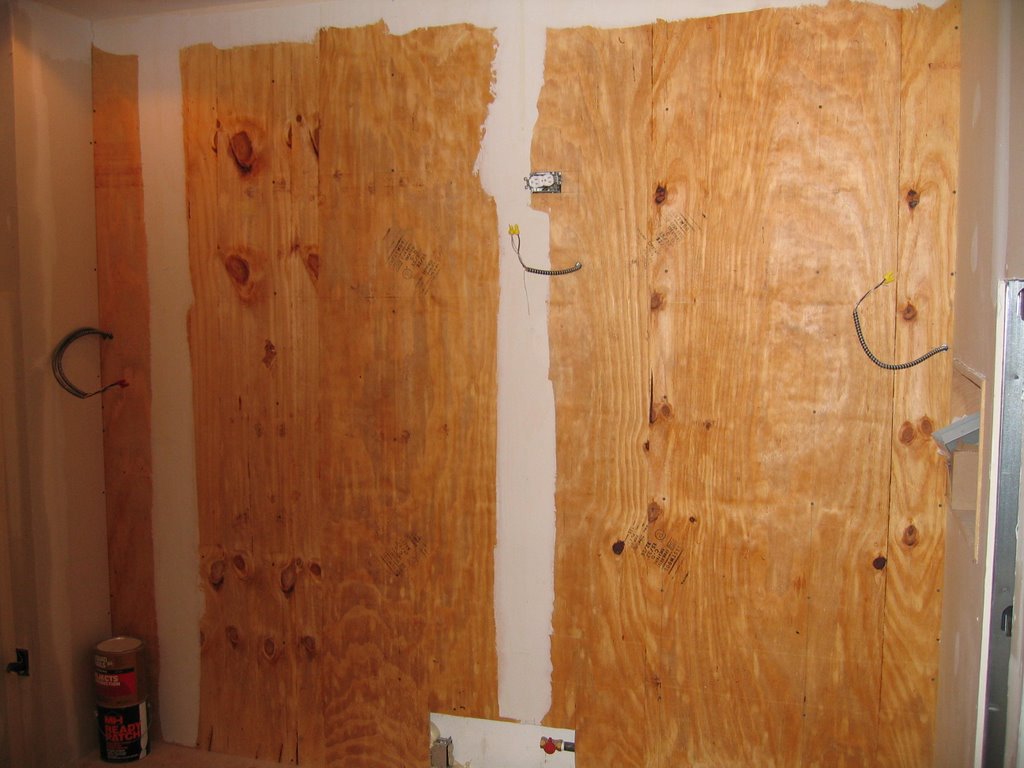
It has been skinned in plywood because the entire surface of the wall will be covered by cabinets, tile and backsplash, so it doesn’t need to be a paint friendly surface. Also, because so many things will be screwed to it, why hunt for studs? Why not just willy nilly sink screws into a friendly piece of plywood?
I’m taping the seems and the corners to add insurance to our pest policy. By the way, news to everyone, there has never been one roach or other creepy crawly in our apartment since taking occupancy in 2001. How’s that for New York City! I did however take the opportunity remodeling afforded me to fill gaps and holes etc. with Great Stuff, that wonderful spray foam that expands and becomes this solid barrier, forbidding the migration of anything with a thought toward infiltration.
Details:
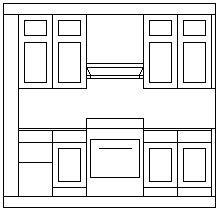
Ikea cabinets (more on that later) will be edge-taped with iron on Cherry veneer. The doors I made this past summer in Iowa City in my super hosts shop will then be hung. The drawer fronts that I also constructed with the doors will be attached to drawers I ordered from here, with drawer slides from here. There will be a tile backing as wide as the stove and rising to the ceiling. Two custom panels made from a collection of wine corks (more on those later) will serve as the back splash, covering the space from the countertop to the bottom of the cabinets. The floor will be cork from here, glued onto masonite which will be glued onto the 3/4 inch plywood now in place.
There’s an AC outlet and the gas service at the bottom of the wall behind where the stove goes. There are two wires sticking out on either end of the wall that are for the under cabinet plug strips. There is a wire sticking out for the hood and a switched plug that will be for an up light above the shelf above the hood. Capice?
So that’s the first installation of WALL BY WALL. Cheers.
posted by Fox @ 10:21 PM
![]()
![]()


0 Comments:
Post a Comment
<< Home